DIY HARDWARE GUIDE
RetroSpy USB based Controller Getting Started
Parts, wiring, firmware, and setup instructions for this RetroSpy configuration.
Downloads
- Download the latest RetroSpy release. It contains the desktop application and controller firmware.
- Download the Arduino IDE only if you need to program your own Arduino board.
Supported Consoles
- Microsoft Xbox
- Microsoft Xbox 360
- PlayStation 3
- PlayStation 4
- Nintendo Switch
- Sony PlayStation Classic
- The C64 Mini
- Neo Geo Mini
- Sega Genesis Mini
- NEC TurboGrafx-16 Mini
Known Issues
- Memory cards and the Xbox Communicator are not currently supported for original Xbox on the controller being spied on.
- Xbox currently requires RetroSpy to be closed and reopened after loading a game from the dashboard.
- Xbox 360 requires a specific startup sequence to correctly work, which is outlined later.
- Some Non-Pro Switch controllers do not seem to work 100% of the time. Closing and restarting RetroSpy will usually get them connected if you encounter a problem.
- Connecting to the PS3 is a bit tricky, sometimes it takes a few tries.
- The ‘Y’ button must be held down when powering on, or connecting, an 8BitDo SN30 Pro USB in order for it to be recognized by the Switch.
Choosing Your Hardware
The easiest approach:
- Purchase a complete RetroSpy Vision USB from here.
For the DIY approach:
There are two hardware solutions for using RetroSpy with USB-based controllers/consoles. Each has its own pros and cons.
Option 1: Beaglebone Black/Green
Pros
- Requires no additional configuration once the firmware is loaded.
Cons
- Requires a wired ethernet connection on the same network as the display computer.
Option 2: Beaglebone Green Wireless
Pros
- No wired Ethernet connection required, wireless connectivty on the same network as the display computer is required instead.
Cons
- The initial setup of the wireless networking is currently a highly manual error prone process.
Make Your Choice
My personal conclusion is that if you have the wired Ethernet connection go with the Beaglebone Black because it is a simpler solution, but choose what fits your situation the best.
If you purchased a pre-programmed board, skip this section and continue to the RetroSpy application setup.Program the Arduino
firmware/firmware.ino from the latest RetroSpy release.the required controller mode. Leave only the mode required by this guide enabled.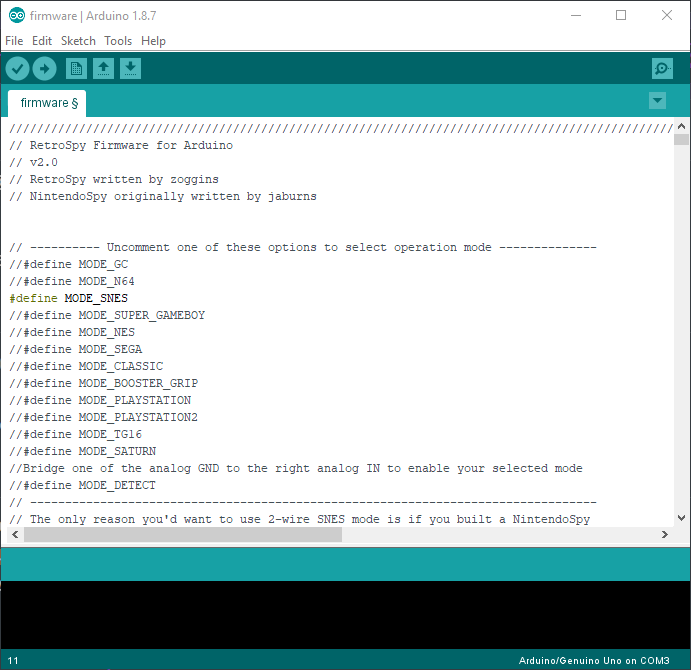
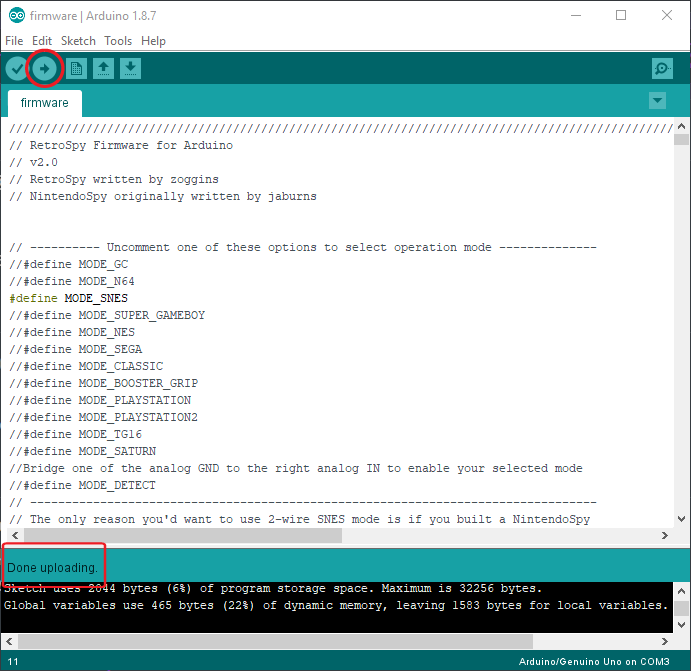
Use the RetroSpy application
Troubleshooting