What You Need
The easiest approach:
- Purchase a RetroSpy Vision CDi Input Display
For the DIY approach:
It is possible to operate both wired and wireless spying at the same time, but its not required. You can do either wired or wireless if you choose.
Components needed for both wireless and wired controllers
- Arduino Uno or Arduino Nano
- USB cable to connect the Arduino to your computer
Components and Equipment needed wireless controllers
- An IR Receiver tuned to 38kHz, I used a TSOP38238
- Wires to connect the IR receiver to the Ardiuno, like these
Components and Equipment needed for wired controllers
- 8-Pin Mini-DIN Serial Cable
- 8-Pin Mini-DIN Pass-through Breakout Board
- Wires connect to the breakout board, like these
Software
- The latest Arduino software
- Firmware for the Arduino
- cyborg5’s IRLib2 Ardunio library, found here
- PC software to connect to the Arduino and display the controller
#2 and #4 are included in the release package of RetroSpy. The firmware is located in the experimental/cdi folder and is called cdi.ino. Just run RetroSpy.exe to launch the display software.
Instructions
Wiring
It is possible to solder jumper wires onto each wire of the extension cable like some other platforms, but since teh CD-i uses a standard mini-DIN port, we can build a cable with no soldering required.
Wireless
- Connect the data pin of the IR Receiver to Arduino Pin 2. The IR receiver will also likely need 5V and GND, so connect accordingly.
Wired
- Connect the controller to one end of the breakout board and the 8-Pin Mini-DIN Serial cable to both the CD-i and the other end of the breakout board.
- Connect CD-i controller Pin 2 to Arduino Pin 9 and Pin 5 to Arduino GND. NOTE: The breakout board I linked above has Pin 2 marked as Pin 9 and Pin 5 was marked as Pin 2, if you are using the same breakout board connect Pin 9 and Pin 2 of the breakout board to Pin 9 and GND of the Arduino.
Software and Setup
Once the wiring is done and everything is hooked up to your game system and computer, now for the easy part.
- Plug in the USB cable to your Arduino and PC.
- Install the latest Arduino software, download the Windows Installer option.
- Once installed, open the Arduino software, you should see “Arduino Uno on COMX” at the bottom right corner if everything is working. If not, you may need to restart and/or replug the USB connector.
![]()
- Install cyborg5’s IRLib2 library. Installation directions are here.
- Download and unzip the latest release of RetroSpy somewhere.
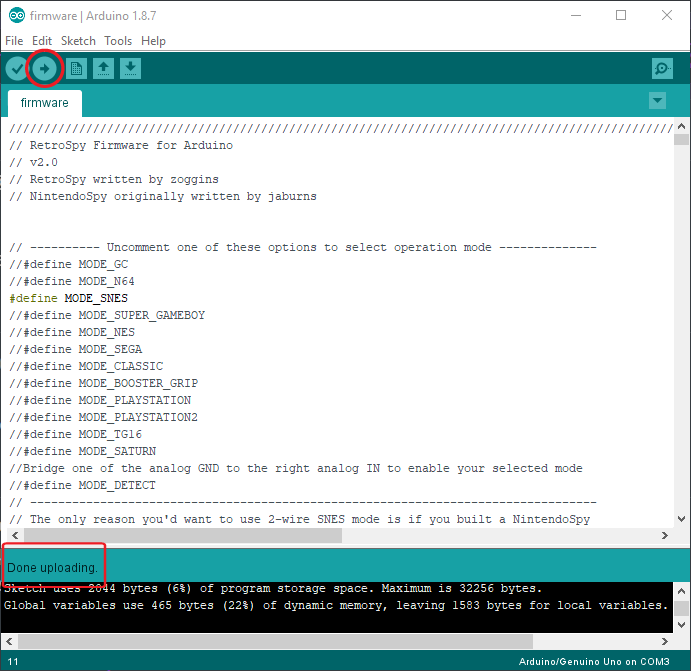
- Select File->Open and open the
cdi.inofile from theexperimental/cdi - Hit the upload button (right pointing arrow) located just under the ‘Edit’ menu, this will upload and run the software on the Arduino. It should look like the following image. Once successfully uploaded, you won’t have to upload software again to the Arduino again unless you want to change controller modes.
- Run
RetroSpy.exe - The selection here should be pretty straightforward, select the ‘COMX’ port that the Arduino is on, select the controller you are using, select a skin, and hit ‘Go’. If everything is hooked up correctly you should see your controller and inputs displaying.
Recent Comments