Step 0: What You Need
- Seeed Studio BeagleBone Green Wireless
- USB Y Cable for External Hard Drive – USB A to micro B
- MicroSD Card >= 4GB
- MicroSD Card Reader of some kind, like this
- (May Be Necessary) 1 or 2 USB Extension Cables
- (May Be Necessary) Ethernet cable
- (For original Xbox only) USB Adapter Cable for Xbox
- (For original Xbox only) Xbox Controller to PC USB Adapter Cable
- (For Neo Geo Mini only) USB C Adapter Hi-Speed USB USB-A 3.0 to USB Type C
- (For Neo Geo Mini only) USB Type-C to USB 3.1 Gen1 Female Adapter Cable
- (Optional) BeagleBone Green Wireless Transparent Case
Step 1: Install the antenna
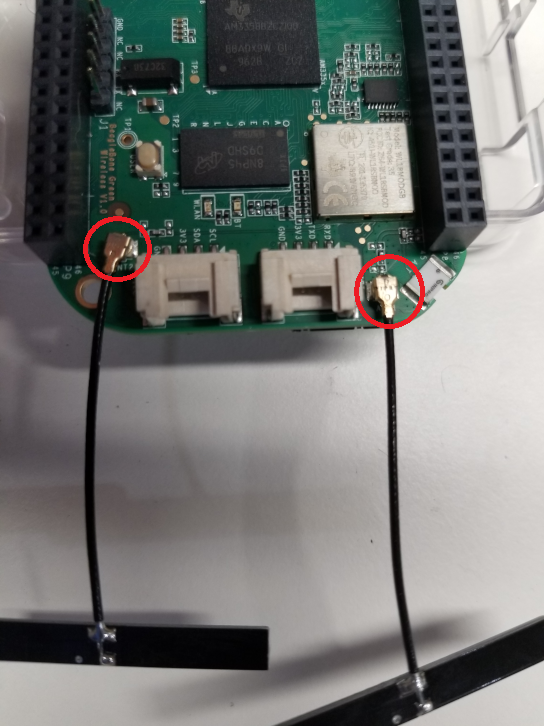
The “plugs” are really tiny, but press the antenna into the connectors on your board.
Step 2: Install the latest RetroSpy OS image
Step 2a: Download the latest software image
Download the lastest RetroSpy image from here. The file you download will have an .img.xz extension. This is a compressed sector-by-sector image of the SD card.
Step 2b: Install SD card programming utility
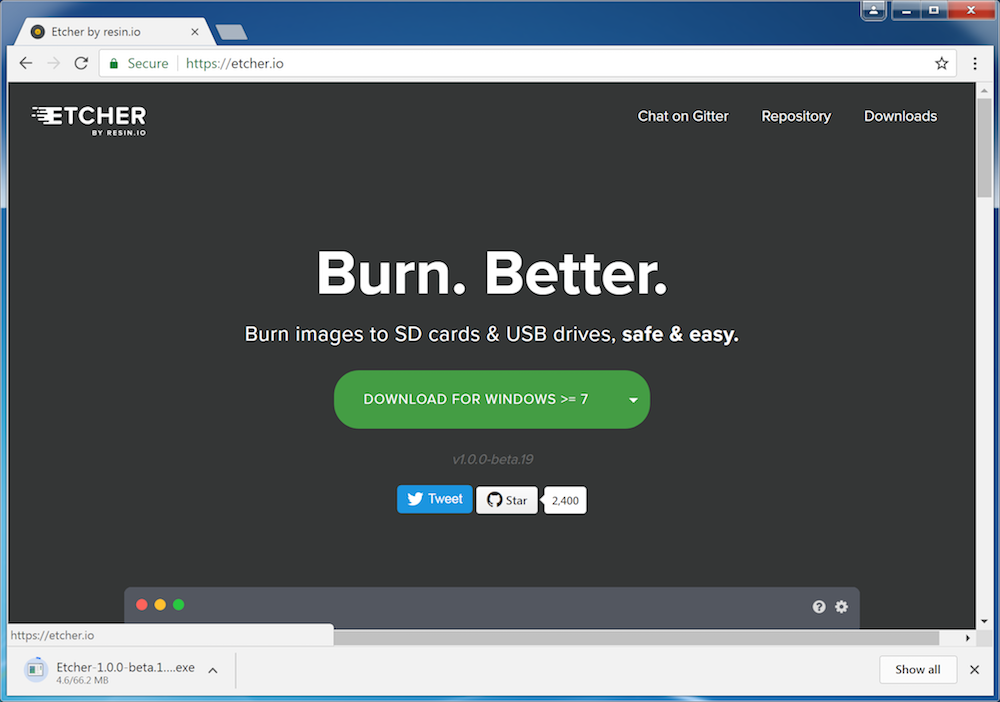
Download and install Etcher.
Step 2c: Connect SD card to your computer
Use your computer’s SD slot or a USB adapter to connect the SD card to your computer.
Step 2d: Write the image to your SD card
Use Etcher to write the image to your SD card. Etcher will transparently decompress the image on-the-fly before writing it to the SD card.
Step 2e: Eject the SD card
Eject the newly programmed SD card.
Step 2f: Boot your board off of the SD card
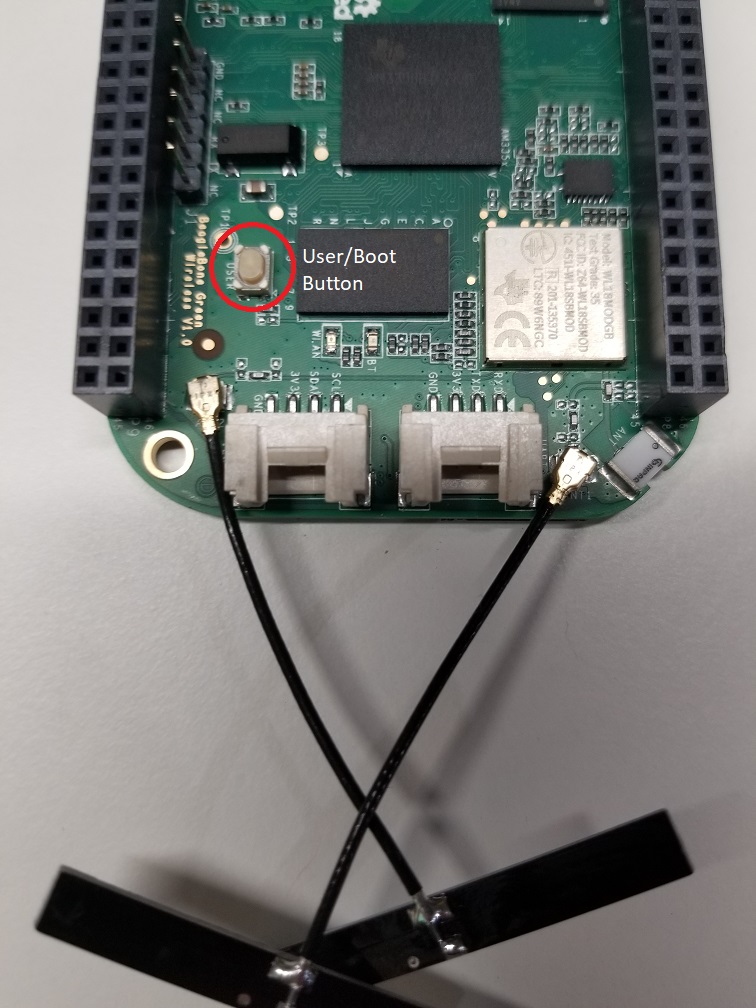
Insert the SD card into your powered-down board, hold down the USER/BOOT button and apply power via the USB cable that came with the board. You should continue to hold the USER/BOOT button for 5 to 7 seconds and then release it. The USR LEDs blink during this process. Flashing can take about 30 to 40 minutes. When this process is finished, all four USR LEDs will be off.
Step 2g: Unplug your board
Step 2h: Remove the SD card from your board
If you don’t remove the microSD card the next time you boot your BeagleBone Black, or if you remove the microSD card while the flashing process is occurring, your eMMC memory can get corrupted and your BeagleBone Black won’t boot. If the card does become corrupt, you have to repeat this process to flash your BeagleBone’s eMMC memory properly.
Step 3: Hook everything up
Hook everything up according to the picture below.
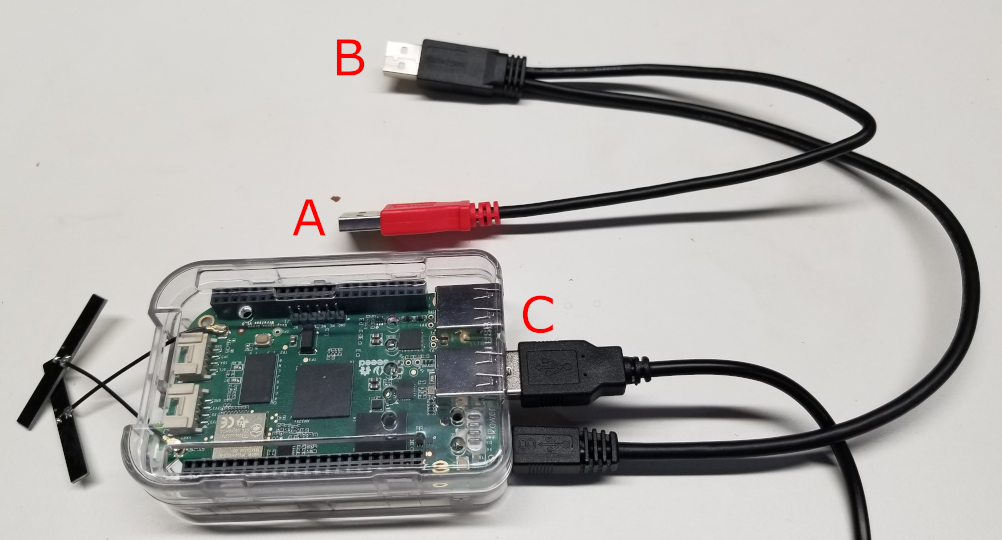
A. Power
This can be a USB port on your computer or a wall plug like a cell phone charger.
B. Console
C. Controller
Step 4: Setup WiFi & Find your IP
Step 4a: Install PuTTY on a PC with a wireless network card
Download and install PuTTY on your PC. The machine does not have to be your streaming PC, but it does need a wireless network card. This could also be done via an SSH client on a smart phone.
Step 4b: Connect to the Beaglbone’s wireless AP
The network will be named something like BeagleBone-XXXX and the connection password is BeagleBone without the quotes.
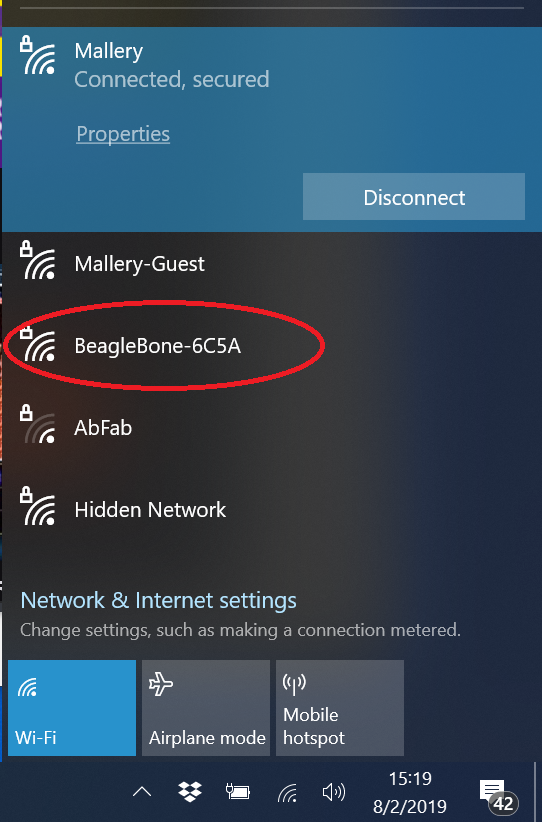
Step 4c: SSH into your board
Open PuTTY and enter 192.168.8.1 into the hostname text box. Hit the Open button. Use the username debian and password temppwd when prompted.
(Optional) Step 4d: Change debian’s password
Once logged in, execute passwd and change the default password.
Step 4e: Setup Wifi with connman
Execute connmanctl at the prompt.
First scan for any wifi technologies:
# connmanctl> scan wifi
To list services:
# connmanctl> services
MyNetwork               wifi_dc85de828967_68756773616d_managed_psk
OtherNET                wifi_dc85de828967_38303944616e69656c73_managed_psk
AnotherOne              wifi_dc85de828967_3257495245363836_managed_wep
FourthNetwork           wifi_dc85de828967_4d7572706879_managed_wep
AnOpenNetwork           wifi_dc85de828967_4d6568657272696e_managed_none
Now you need to register the agent to handle user requests. The command is:
# connmanctl> agent on
You now need to connect to one of the services. To do this easily, just use tab completion for the wifi_ service. If you were connecting to OtherNET in the example above you would type:
# connmanctl> connect wifi_dc85de828967_38303944616e69656c73_managed_psk
The agent will then ask you to provide any information the daemon needs to complete the connection. The information requested will vary depending on the type of network you are connecting to. The agent will also print additional data about the information it needs as shown in the example below.
Agent RequestInput wifi_dc85de828967_38303944616e69656c73_managed_psk
   Passphrase = [ Type=psk, Requirement=mandatory ]
   Passphrase?
Provide the information requested, in this example the passphrase, and then type:
# connmanctl> quit
Step 4f: Find your IP
After quiting connmanctl give the board a minute to connect to your wifi. After waiting a little bit, execute ifconfig at the command prompt. You will see output like this:
debian@beaglebone:~$ ifconfig
SoftAp0: flags=4163<UP,BROADCAST,RUNNING,MULTICAST>  mtu 1500
        inet 192.168.8.1  netmask 255.255.255.0  broadcast 192.168.8.255
        inet6 fe80::7a04:73ff:fe4c:6c5a  prefixlen 64  scopeid 0x20<link>
        ether 78:04:73:4c:6c:5a  txqueuelen 1000  (Ethernet)
        RX packets 3824  bytes 403093 (393.6 KiB)
        RX errors 0  dropped 2  overruns 0  frame 0
        TX packets 2551  bytes 482604 (471.2 KiB)
        TX errors 0  dropped 0 overruns 0  carrier 0  collisions 0

lo: flags=73<UP,LOOPBACK,RUNNING>  mtu 65536
        inet 127.0.0.1  netmask 255.0.0.0
        inet6 ::1  prefixlen 128  scopeid 0x10<host>
        loop  txqueuelen 1000  (Local Loopback)
        RX packets 2880  bytes 197440 (192.8 KiB)
        RX errors 0  dropped 0  overruns 0  frame 0
        TX packets 2880  bytes 197440 (192.8 KiB)
        TX errors 0  dropped 0 overruns 0  carrier 0  collisions 0

wlan0: flags=-28605<UP,BROADCAST,RUNNING,MULTICAST,DYNAMIC>  mtu 1500
        inet 192.168.1.106  netmask 255.255.255.0  broadcast 192.168.1.255
        inet6 fe80::e1c:57ff:fea8:55b4  prefixlen 64  scopeid 0x20<link>
        ether 0c:1c:57:a8:55:b4  txqueuelen 1000  (Ethernet)
        RX packets 304  bytes 85262 (83.2 KiB)
        RX errors 0  dropped 0  overruns 0  frame 0
        TX packets 306  bytes 73614 (71.8 KiB)
        TX errors 0  dropped 0 overruns 0  carrier 0  collisions 0
What we are after is the IP of wlan0, which in the above example is 192.168.1.106. If you don’t see an IP yet, give it some time and execute ifconfig again. If you see an IP starting with 169 something has gone wrong and you may have to reboot your board and return to this step find the real IP. You should not have to repeat Step 4e ever again, unless your wireless network name or password changes.
Step 4g: Disconnect from BeagleBone-XXX
Don’t forget to disconnect from the BeagleBone’s AP. It will technically act as a wwireless router, but its not a very good one.
Step 5: Starting up RetroSpy
Each system currently has its own quirks (due to the fact that I cobbled all this together in about a week). So follow the links to the system you are trying to spy on: Nintendo Switch, PlayStation Classic, Microsoft Xbox 360, Microsoft Xbox, Sega Genesis Mini, The C64 Mini, Neo Geo Mini, TurboGrafx-16 Mini, PlayStation 3, PlayStation 4 or Atari VCS.

Recent Comments